


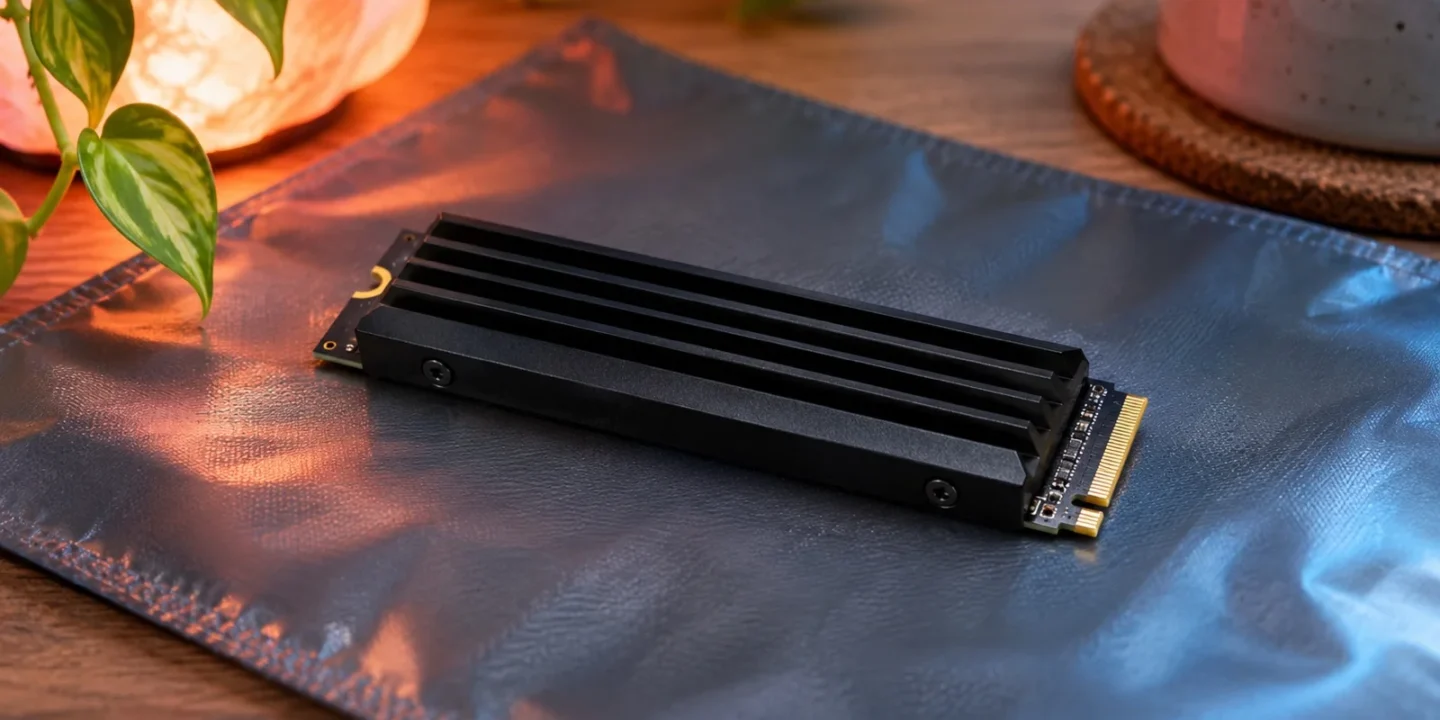
A compatible M.2 SSD can provide additional playable storage for PS5 games, including an installed GTA 6 copy when its platform requirements are satisfied. Choose the drive against Sony’s current specification, follow the installation instructions for your exact console model, and verify a successful game launch after moving the installation. Adding storage does not create a game license, replace a save backup, or guarantee a higher frame rate.
This guide helps you plan the upgrade and validate the result. It does not recommend an untested drive or claim a GTA 6 benchmark. Physical installation details differ across PS5 model groups, so use the linked official illustrations while handling the hardware. An editorial image of a drive is not a substitute for the correct screw, spacer position, or cover-removal diagram.
Decide whether expansion solves your actual problem
First check what is consuming space. If you only need to remove a few old recordings, buying another SSD may be unnecessary. If your active game library repeatedly exceeds the internal storage, additional playable space may solve the recurring problem. Write down which games you want available at the same time and compare their installed sizes with the free space shown by the console.
Keep capacity planning separate from troubleshooting. A game that crashes with ample space is not automatically fixed by installing a larger drive. Similarly, an ownership error does not become a storage issue because it appeared while a download was queued. Identify the message and the desired outcome before ordering hardware. A good upgrade plan answers where the game will live and why the existing storage arrangement is insufficient.
Check the current compatibility requirements
Sony’s specification identifies PCIe Gen4 x4 M.2 NVMe drives using Key M, with supported capacities and physical dimensions listed on its installation page. SATA M.2 drives are excluded. The company recommends sequential read performance of at least 5,500 MB/s and requires effective heat dissipation within its dimensional limits. Compare the complete drive-and-heatsink assembly, not the bare circuit board alone. Official PS5 M.2 requirements and installation instructions
Use the exact product number when checking a retailer listing. A family of drives can include several capacities and different cooling arrangements. A photograph showing a heatsink does not establish that the item in your basket includes that part. Save the manufacturer’s specification and the listing you intend to buy. If measurements are unclear, ask the seller or manufacturer before placing the order rather than assuming all storage described as gaming compatible is equivalent.

Treat a heatsink as part of the fit
The enclosure around the expansion slot has limited space. Your compatibility check therefore needs the total height and width of the cooling assembly. A drive can have the right connector yet still be unsuitable in the form supplied. Do not plan to force the cover closed or remove required cooling simply to make an oversized assembly fit.
If the selected product already includes a heatsink, follow its manufacturer’s instructions and Sony’s guidance rather than stacking another one on top. More metal is not automatically a better installation. Before opening packaging, make sure you understand which parts arrive attached, which parts you would need to fit, and whether the completed assembly remains within the console’s requirements.
This is also a sensible point to decide who will install it. If you are uncomfortable handling a small screw or identifying the correct cover, seek qualified assistance. The useful goal is a correctly installed drive, not completing the job without help.
Protect data before changing the hardware
Check your saved progress and important captures separately. The game installation, save data, and recordings are different categories. Moving an application to another storage device is not evidence that its progress has been archived. If the console will also be reset, exchanged, or repaired, use the relevant backup procedures before treating the SSD project as complete.
Consider the new drive’s existing contents too. Sony’s first-use setup formats the M.2 device, which erases its data. A drive borrowed from a computer should not be installed while it still contains the only copy of somebody’s files. Identify the device and preserve its contents through an appropriate computer workflow before allowing a format operation.
Record the starting situation: console model, system version, existing free space, and the location of the current game installation. You do not need a laboratory report. These four facts make it easier to understand an unexpected prompt or compare the finished setup with the original.
Prepare the workspace and model-specific instructions
Work on a clear, stable surface with enough light to see the screw and spacer. Keep drinks, loose fabric, pets, and unrelated small objects away from the area. Open Sony’s instructions for the console model group you own before disconnecting anything. The shape of a console in a social-media tutorial is not a reliable guide to yours.
Turn the console off fully and follow the official disconnecting and cooling directions. Have the specified screwdriver ready. Put removed parts in a small container so they cannot roll into a vent or get mixed with unrelated screws. If the assembly does not look like the diagram, stop and recheck the model rather than improvising.
Sony also provides precautions for static electricity and handling. Follow those while touching the drive. Do not operate the console with its cover removed. These are hardware installation conditions, not optional optimizations or special GTA 6 performance tricks.

Follow the official installation sequence
Use Sony’s illustrated sequence to remove the correct cover, access the expansion bay, position the spacer for the drive length, seat the device, and secure it. This article deliberately does not replace those model-specific drawings with a universal hand movement. The screw location and cover arrangement are exactly the details that deserve a verified visual reference.
If the connector resists, the drive sits at an unexpected angle, or a part drops inside the console, stop. Do not apply extra force or power the console on to see what happens. Revisit the official directions or get support. Continuing after an uncertain fit can turn a reversible installation question into damage.
When the hardware is correctly secured and the covers are back in place, reconnect the console and follow its setup prompts. Read the storage device identified by each prompt. Do not approve an erase action merely because you expect some kind of formatting to be necessary.
Check that the new storage is recognized
Once setup finishes, inspect the console’s storage view. Confirm that the M.2 device appears and that its reported usable capacity is plausible for the product you installed. Advertised capacity and displayed available space need not be identical, but an unexpected device name or an absent storage category should be investigated before moving a large library.
Keep the packaging and purchase details until the upgrade has been checked. If you need vendor support, the exact model, capacity, and cooling configuration are more useful than saying it was a fast SSD. Record any message shown during initialization instead of relying on memory after the console restarts.
Do not repeatedly remove and reinstall the drive as a first response to every software issue. Begin with the displayed message and the current official troubleshooting route. Hardware handling should answer a specific question, particularly once the device is already recognized normally.
Move the installation and check the destination
Use the PS5 storage-management controls to select the installed game and move it to the M.2 storage. Wait until the operation finishes. Then verify the installation’s listed location rather than assuming that selecting a default destination also moved existing applications. A setting for future installations and a completed move of an existing game are separate actions. PS5 storage-management guidance
After the move, launch the game under the intended player account. Confirm that the expected progress is visible and that you can reach a normal playable state. These observations verify more than a library icon does. An icon can remain present while an update, license check, or incomplete operation still prevents play.
Keep a note of the game version used for this check. If a later update changes behavior, that detail helps you separate the original upgrade result from a subsequent change. Do not describe a one-time successful launch as a comprehensive performance test.
Compare problems with the internal storage
Sony advises moving a game back to the internal SSD if problems occur while playing from M.2 storage. That creates a useful comparison when the console has enough room. Keep the account, game version, save, and test action consistent so the storage location is the main changed condition.
For example, if a launch fails from the expansion drive, record the message, move the application back, and repeat the same launch. A successful internal-storage test suggests a direction for further investigation, but it does not identify a particular component as defective by itself. The drive, installation state, and conditions of the move still deserve examination.
Avoid deleting saved data to make this comparison cleaner. You are testing application location, not trying to erase evidence. If the behavior occurs from both locations, report that result and widen the investigation instead of blaming the new drive solely because it was installed recently.
Plan capacity without promising a fixed GTA 6 size
Use the installed version or current product information for the actual space requirement. Updates can change the installation, and a successful fit today does not promise that every future patch will use the same amount of space. Keep some flexibility in the active library rather than organizing storage around a number copied from an old screenshot.
You can make a simple budget with three groups: games you play regularly, games you want available occasionally, and recordings you intend to archive elsewhere. The purpose is to decide what needs fast playable storage. A large media archive and an active game installation have different access patterns and preservation needs.
Do not buy expansion solely because an article promises faster GTA 6 frame rates. This guide makes no such claim. The concrete benefit being planned is additional compatible storage from which supported PS5 applications can run.
Worked example: adding room for an active library
Imagine your internal storage is nearly full, but you want GTA 6 and two other large games installed together. First measure the current requirement on the console. You choose a specific compatible M.2 model with a suitable cooling assembly after checking its complete specifications. You verify saves and export irreplaceable recordings before hardware work.
Following the correct console-model instructions, you install and initialize the new drive. You move one application first and confirm its location and launch behavior. Then you move the remaining selected games. The original list lets you confirm that the intended titles are present, while the storage view shows how much flexibility remains.
If GTA 6 behaves differently after the move, you record the exact failure and compare the same action from internal storage. You do not immediately reinstall the system or delete progress. The next decision follows the evidence from the comparison, which is more useful than repeating the whole upgrade blindly.

Keep a return path for an uncertain upgrade
Before moving the entire library, decide how you would respond if the new arrangement behaves unexpectedly. If practical, leave enough room internally to move one affected application back for comparison. You do not need to keep duplicate installations of everything; you need a realistic way to test the particular title that presents a problem.
Preserve the original drive packaging and the vendor’s return or support instructions while evaluating the installation. Do not discard small supplied parts because the first launch worked. An intermittent recognition problem may require the exact model number and a description of the fitted cooling assembly later.
Manufacturer documentation is useful alongside Sony’s compatibility page. For example, Seagate’s installation manual separately describes disconnecting and cooling the console, static precautions, and preserving existing drive contents before formatting. Follow the instructions supplied for your chosen device rather than transferring product-specific dimensions from another model. Example manufacturer installation precautions
A completed upgrade should leave you knowing the application location, backup status, and support route. That practical record is more useful than an unverified claim that the console now loads every GTA 6 scene faster.
Common questions about PS5 M.2 storage
Is a USB SSD the same as an internal M.2 expansion?
No. They use different connections and have different roles in the PS5 storage system. Sony documents playable PS5 game storage on compatible M.2 devices, while PS5 applications archived on USB extended storage need to be copied back to supported playable storage. Check the correct instructions for the device you own.
Will the drive include my saved progress if I remove it?
Do not assume that moving an application also relocates every kind of user data. Keep a separate save-backup plan and check Sony’s transfer instructions before moving hardware between consoles. An application being installed on a drive is not a complete backup of the account or console.
What should I keep after a successful upgrade?
Retain the product model, proof of purchase, and a short record of the successful storage and launch checks. Keep important backups independent of the application drive. Those details help if the console later needs service or the drive needs to be checked by its manufacturer.
Related guides
- GTA 6 Install Size: How Much Space Do You Need on PS5 and Xbox?
- How to Free Up Space for GTA 6 on PS5 and Xbox
- Can You Install GTA 6 on an External Drive? PS5 and Xbox Storage Guide
- How to Back Up GTA 6 Saves on PS5 With PlayStation Plus
- GTA 6 Console Gets Hot? PS5 and Xbox Ventilation Checks Before Assuming a Fault
- All GTA 6 guides
- GTA 6 Xbox Storage Plan: Internal SSD, Expansion Card or USB Drive?